

Calibrate BeamTracker
Tune what a BeamTracker counts as a part, and how long a gap may run before the line reads as stopped.
BeamTracker measures the distance to whatever is in front of it, many times a second. Calibration sets two independent things: the beam values, which decide which readings count as a part passing, and the downtime filter, which decides how long the line may go without a part before it reads as stopped. Get the first wrong and counts are wrong. Get the second wrong and the counts are right while uptime is not.
Calibrate after installing, after a line speed change, after moving the device, and whenever counts stop matching what the line made.
Prerequisites: the device is installed and aimed, in Install and align BeamTracker, and online. You need the line available to run parts through the beam.
Open the calibration panel
- Open the dashboard and select the asset the BeamTracker is paired to.
- Click the BeamTracker device to open its panel.
- Select the Calibration tab.
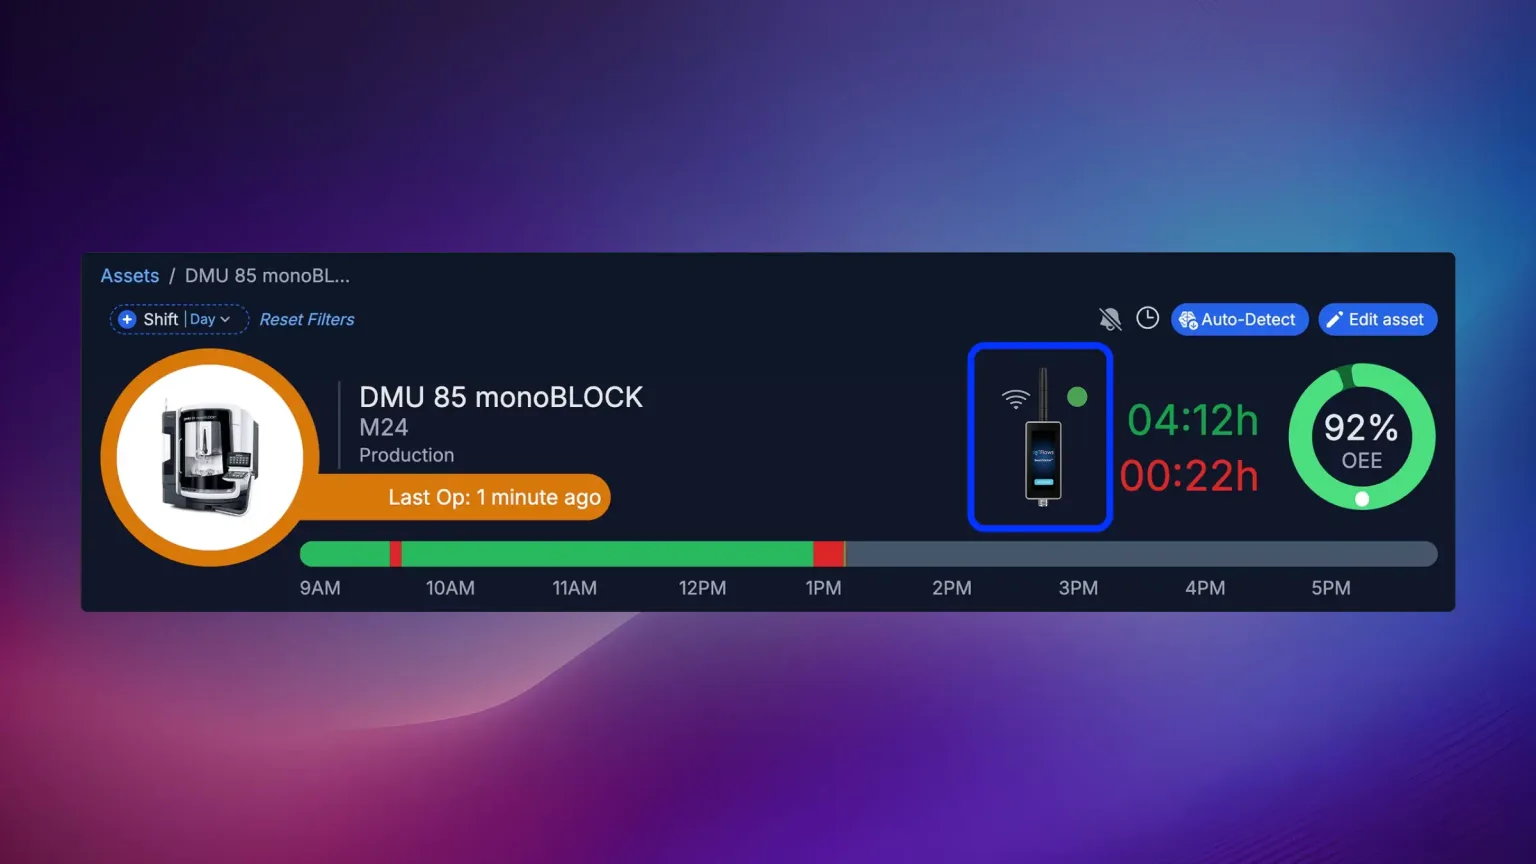 Open the device from its asset, then work in the Calibration tab. Everything on this page is on that tab.
Which fields appear depends on the device's firmware, shown as Firmware Version in the same panel. Live beam calibration needs 2.3 or later, blocked sensor stop time needs 2.1, and the laser light toggle needs 3.0. A device below those shows fewer controls rather than disabled ones.
Set what counts as a part
Four values decide whether a reading is a part. Three are distances in centimetres, measured out from the sensor face.
| Field | What it sets |
|---|---|
| Reading Speed | How heavily readings are averaged before they are judged. Faster 3X through Slower |
| Min Object Thickness (cm) | How far an object must back off again before it stops counting |
| Gap from Background (cm) | Spare room left between the detection zone and the background surface |
| Depth of View (cm) | The far edge of the detection zone. Anything past it is background |
The background is the surface the beam lands on when nothing is passing, for example the far guard rail of a conveyor. Everything nearer than Depth of View is a candidate part, and everything past it is ignored. That is what stops a forklift crossing the aisle behind the line from being counted.
Min Object Thickness is how far the reading must climb back before a part counts as gone. It is a floor, not a ceiling. Set it to the thinnest part you must count, never the thickest, because a floor set too high drops small parts silently and no error says so.
Reading Speed trades responsiveness for stability. Choose a faster setting when parts pass in under a second and the count runs low. Choose a slower one when the count runs high on a dusty line, since heavier averaging rides over a single noisy reading. The Faster options need firmware 3.0 or later.
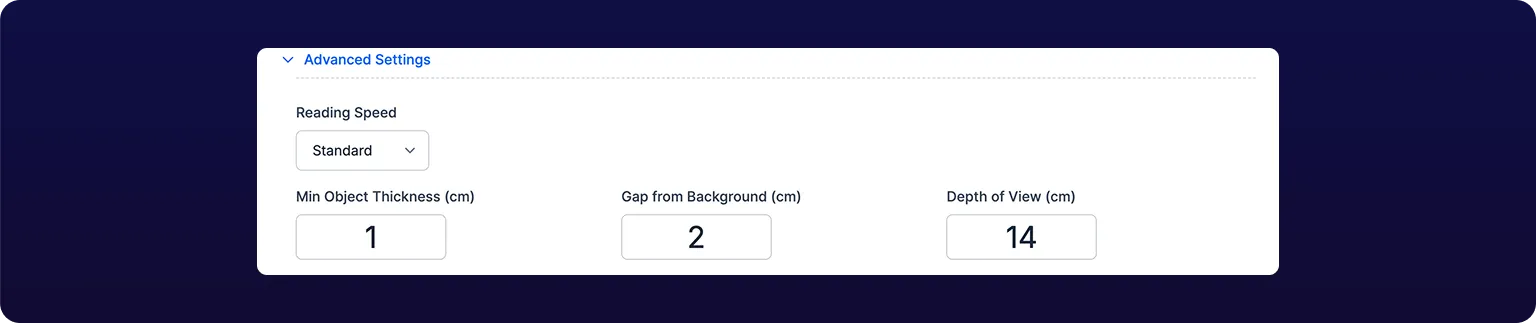 The BeamTracker configuration panel. These four values decide what counts as a part.
If saving reports Detection distance plus thickness must be between 6 and 800 cm, those two values together have landed outside what the device holds. Reduce whichever of them you set last.
Set the range from the device screen
You can also set the far edge at the machine. On the device's screen, tap the Settings icon at the top right and open Calibrate Sensor, which shows the distance it is reading now.
- Clear the beam path, so the reading is the distance to the background.
- Place an object where you want the far edge of the detection zone.
- Tap Calibrate.
The sensor then registers only objects nearer than that distance. Use this path when you are at the machine, or the device predates live calibration. Otherwise prefer the dashboard, which shows the readings while you set the thresholds.
Run a live beam calibration
Live Laser Calibration plots the raw distance reading against your thresholds while the line runs, so you can watch a real part cross them instead of guessing at numbers.
- Start the live view and run parts through the beam.
- Watch where the trace sits with the beam clear, and where it drops as each part passes.
- Clear the beam and click Set as Background to move the background to the current reading.
- Drag the threshold handles, or type into the fields, until every part crosses the detection line and nothing else does.
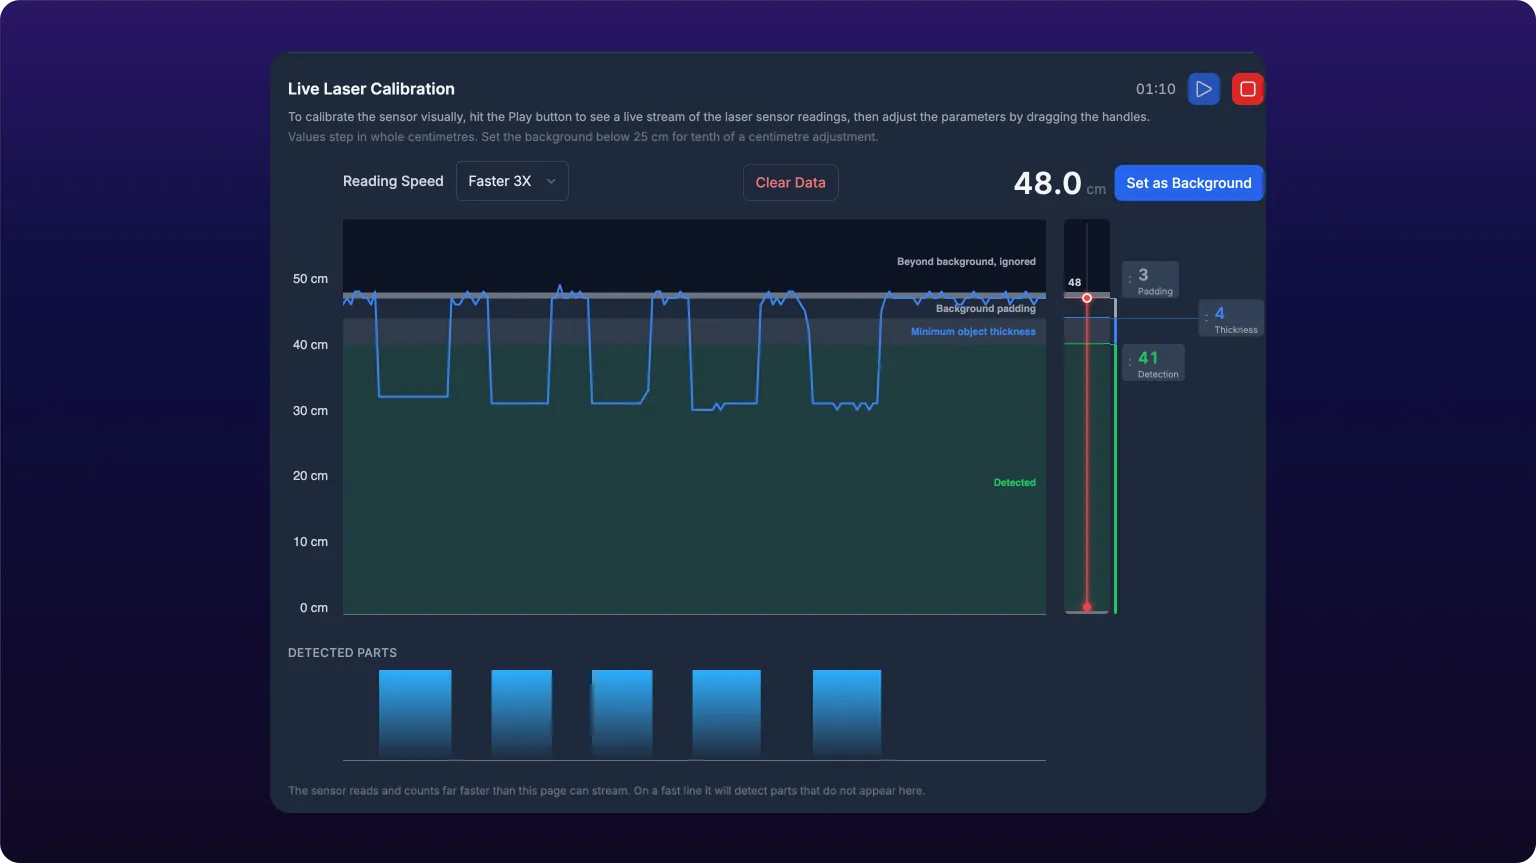 Live beam calibration. The background reading and the detection threshold must be far enough apart to survive dust.
Set as Background rejects a reading under 7 cm with Reading must be at least 7 cm to use as the background: nothing nearer leaves room for a detection zone. Aim at a further surface. If the reading is valid but tight, the panel keeps it and tells you it reduced your padding and thickness to fit.
Set the downtime filter
The Downtime Filter is how long the line stays running after the last part. Every part resets the timer. If no part arrives within the filter, the line switches to stopped, back-dated to the last part, so the report does not credit the gap as uptime.
| Production pattern | Filter |
|---|---|
| Fast continuous production | 15 to 45 seconds |
| Moderate paced operations | 1 to 5 minutes |
| Batch or intermittent work | 5 to 20 minutes |
Watch your normal part-to-part time, then set the filter a little longer to absorb ordinary pauses. Too short chops a running shift into hundreds of false stops. Too long swallows real downtime and reports uptime the line did not earn.
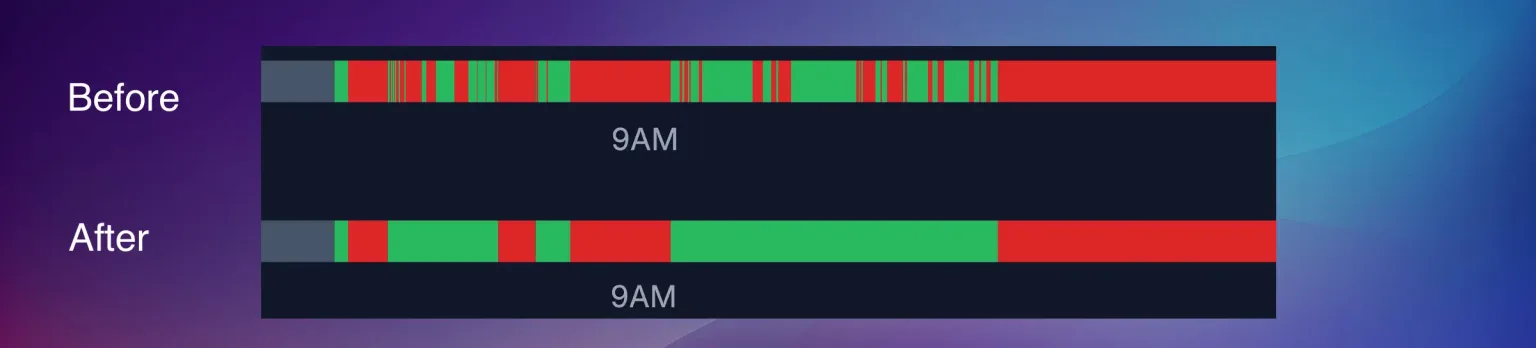 The same shift before and after the downtime filter is set to the line's real part-to-part time. The gaps between parts stop registering as separate stops.
Classify short stops automatically
Auto-Classify Downtimes labels any stop shorter than its value as a short downtime, so nobody classifies brief pauses by hand. With a 10-minute filter and a 30-minute auto-classify value, stops from 10 to 30 minutes are labeled automatically and anything longer waits for a person.
Auto-classify must be greater than the downtime filter. If it is not, saving reports Auto-classify must be greater than downtime filter, naming the current filter value. Raise the auto-classify value above it.
You do not need this if your operators already classify every stop, or if the distinction between a short pause and a real stoppage does not drive anything you report on.
Stop the line when the beam stays blocked
Blocked Sensor Stop Time covers a part that halts in the beam. Without it, an object parked in front of the sensor holds the reading inside the detection zone and the line keeps reading as running. Turn the toggle on and set the seconds, minimum 25. Below that the field reports Minimum is 25 seconds.
Turn it on where a jam leaves the part sitting in the beam. Leave it off where parts always clear, since a false trip records a stop that never happened.
Turn the laser light on
Laser Light makes the beam visible. Turn it on while aiming or checking coverage, then off for production. It is an installer's aid, not a setting the line runs on. Needs firmware 3.0 or later.
Verify against a real run
Calibration is settled by comparison, not by inspection.
- Run the line normally and count parts at the machine for a fixed window.
- Compare that count to the dashboard for the same window.
- Check that running and stopped on the timeline match what the line actually did.
- Watch the next 24 to 48 hours before adjusting again.
Counts low: a part is crossing outside the detection zone, or below the thickness floor. Counts high: something other than a part is crossing, or one part registers twice on a reading speed set too fast. Counts right but uptime wrong: move the downtime filter, not the beam values.
See also
From the blog
- Production line monitoring without PLCsYes. A laser counter at every step, read against Step 1, gives you line yield, the units lost at each step and the step that stopped first, with no PLC access.
- How to monitor a packaging line and count every unitCount output after the last reject, take the ideal rate from the slowest machine, and find which filler, capper or labeler stopped first. With a worked shift.
Tune running and stopped detection for one specific machine from the device's Calibration tab: stream live vibration while the machine works and while it idles, place the running and stopping thresholds against what you captured, then use momentum to stop the status flickering. The same panel carries the shock threshold, the channel selection, the uptime filter and short-stop handling, and this page maps every control to the setting it writes and whether that setting belongs to the sensor or the machine.
The Devices page draws every sensor your organization owns as a topology map: which machine each device is attached to, whether the cloud is hearing from it, and how strong its Wi-Fi signal is. Opening a device shows its firmware, MAC, IP and current SSID, and carries the two tabs that change anything, Calibration and Networks. You do not add, rename or remove hardware here: IoTFlows claims and registers every device before it ships.