

Quickstart: see your first machine's data
Go from a sensor in the box to a machine reporting live utilization.
This page follows one machine down one path: mount the device, get it online, create the machine in IoTFlows, and check the first hour of data. Plan on an hour, most of which is the machine running while you watch.
It covers all three sensors. Two steps differ by device, mounting and calibration, and each carries a tab strip. Pick your device there; the rest of the page reads the same for everyone.
Two terms carry the whole page. An asset is one machine as IoTFlows tracks it: a name, an identifier, a department, and the device that reports its status. Utilization is the share of time that device read the machine as running. Every device reports it, from what it senses: SenseAi and SenseAi Embedded from vibration, BeamTracker from parts passing through its laser beam. See Metrics reference.
Before you start
- A SenseAi, SenseAi Embedded, or BeamTracker that IoTFlows has onboarded to your organization. The device arrives registered; you do not create it. See IoTFlows hardware.
- The IoTFlows mobile app, signed in on the phone you will carry to the machine. Wi-Fi setup runs over Bluetooth from the app and has no web equivalent. See Install the mobile app.
- Sign in to the web dashboard as an Organization Owner or Organization Administrator. Other roles cannot create an asset. See Roles reference.
- Either the IoTFlows 4G/LTE router, or the name and password of a 2.4 GHz Wi-Fi network that reaches the machine.
You do not need parts, operations, or an algorithm to finish this page. Those change how IoTFlows counts parts, not whether the machine reads as running. Come back for them in the Production quickstart.
Mount and power the device
Where you put the device decides how good every number on this page is.
Go to Devices at /<your-org-id>/devices?select=management first and find yours in the topology map. It reads offline until the next section.
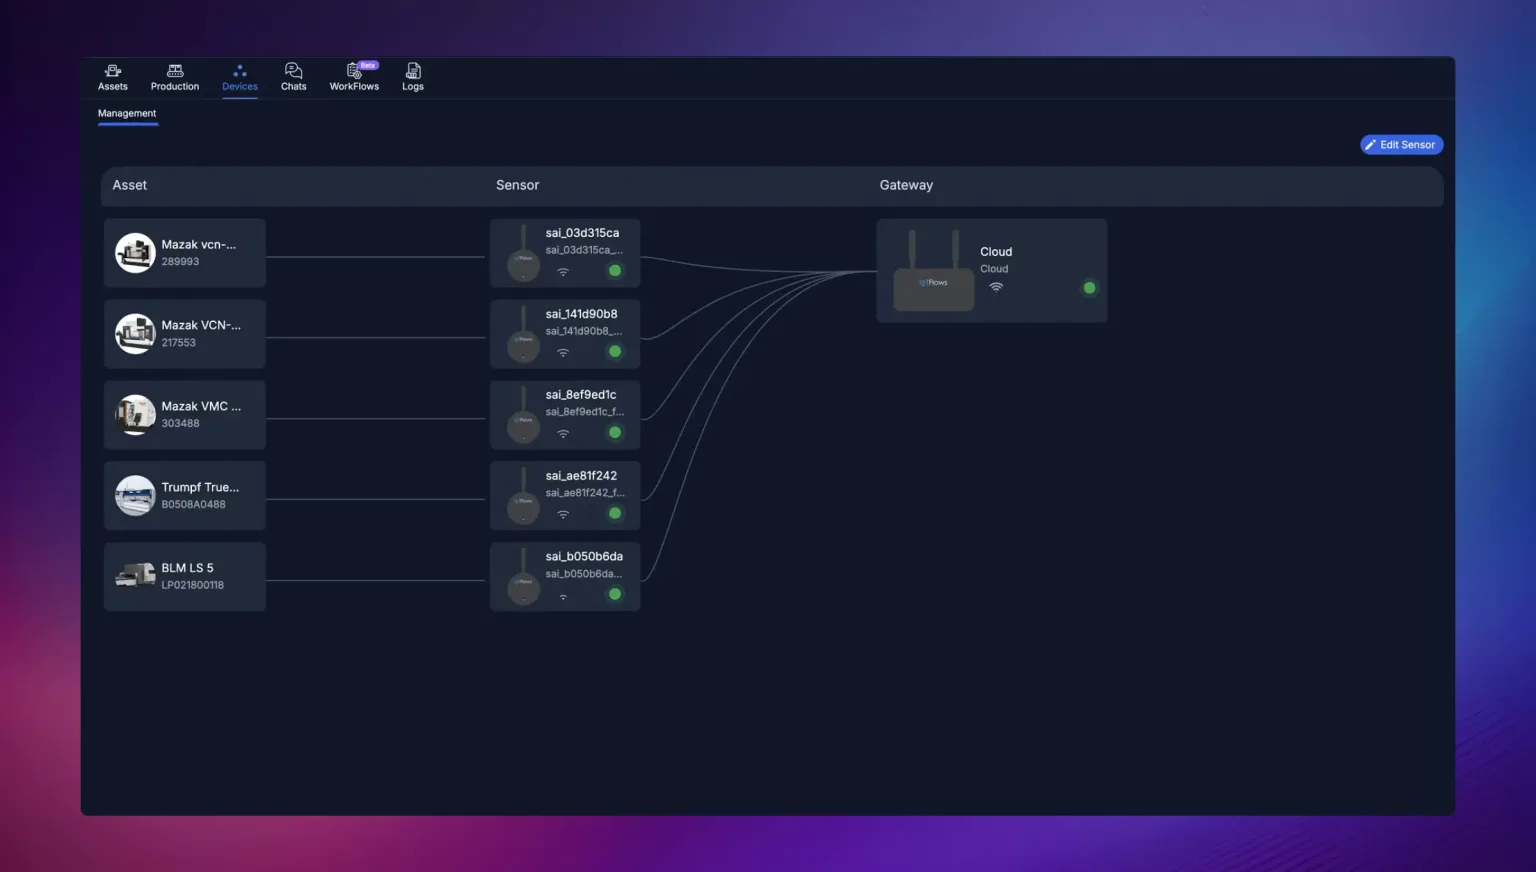 The Devices topology map links each asset to its sensor and on to the cloud. A green dot marks every device that is online.
- Connect the external antenna to the sensor before anything else.
- Pick a spot of flat ferrous metal, close to the spindle, motor, or hydraulic pump. Paint is fine; rubber and plastic give the magnet nothing to hold.
- Attach the sensor with its magnetic base, flat against that surface, where nothing moving can catch it.
- Connect the USB cable to the sensor and plug the adapter into an outlet. The LED lights when the sensor has power.
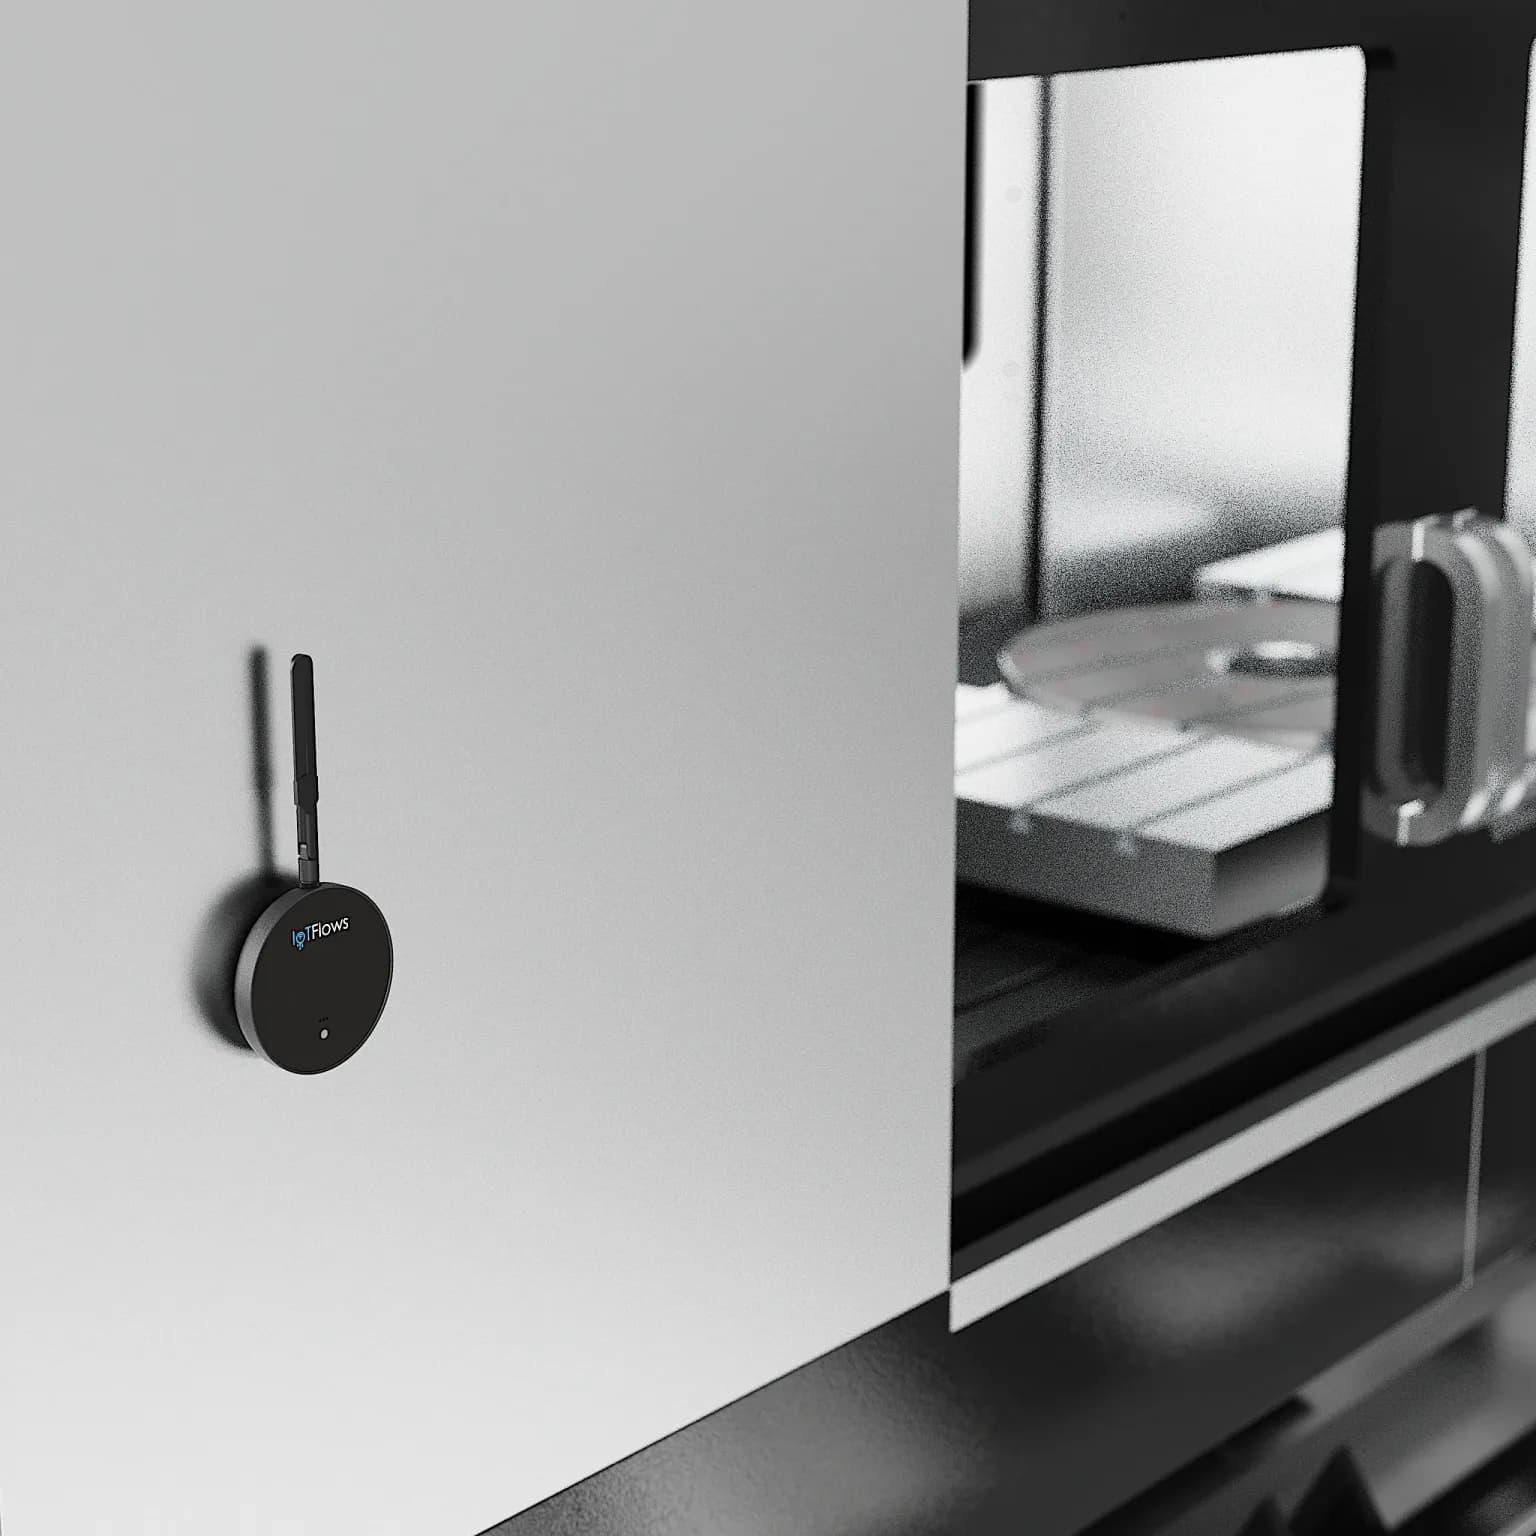 SenseAi mounted flat against the spindle housing, where the vibration you want to measure actually is.
A sensor mounted on a guard door reads the door, not the cut. For an enclosed machine or one with no flat steel, see Install and power up SenseAi.
Connect it to the network
Every device takes the same two paths onto the network. Which one you use depends on what you bought.
With the IoTFlows 4G/LTE router, there is nothing to configure. Power the router within 100 ft (30 m) of the device, near a window for cellular signal, and the device joins its access point on its own. Skip to the next section. See Connect through the 4G/LTE router.
On your own Wi-Fi, provisioning happens over Bluetooth, from the phone, standing at the machine.
- Put the device into setup mode. On SenseAi and SenseAi Embedded, hold the Wi-Fi button for ten seconds until the LED blinks blue. On BeamTracker, tap the Settings icon on the touchscreen, then WiFi Configuration.
- In the app, open Connect Device to WiFi and select your device from the list of nearby devices.
- Pick the 2.4 GHz network, type the password, and send it. The device reboots and joins the network.
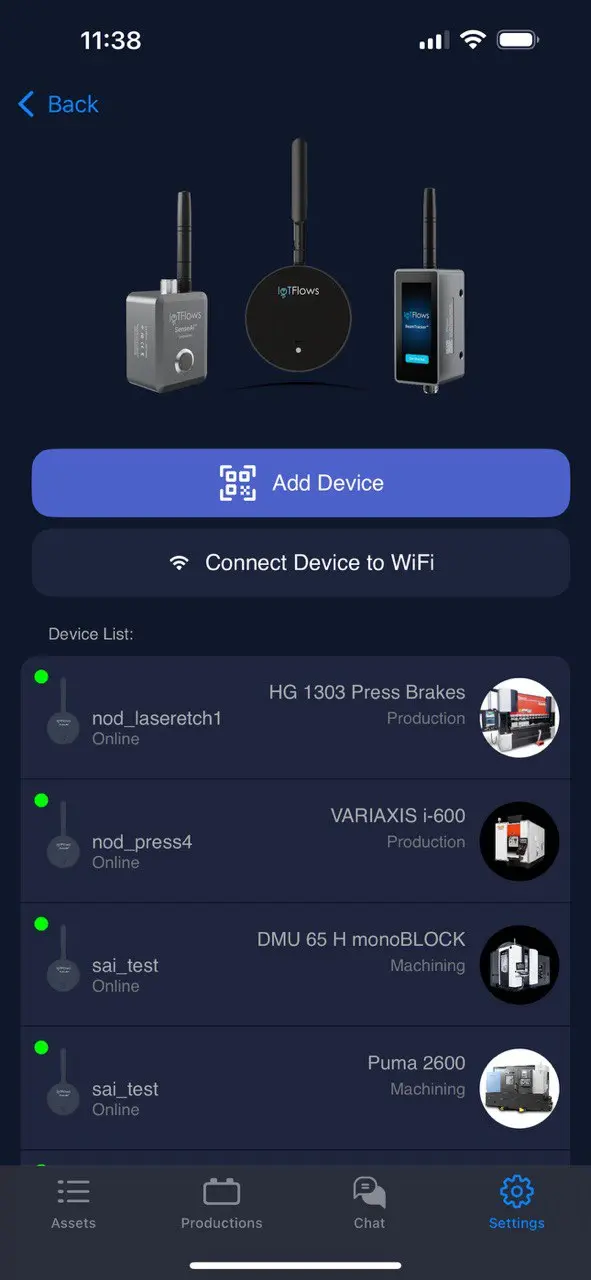
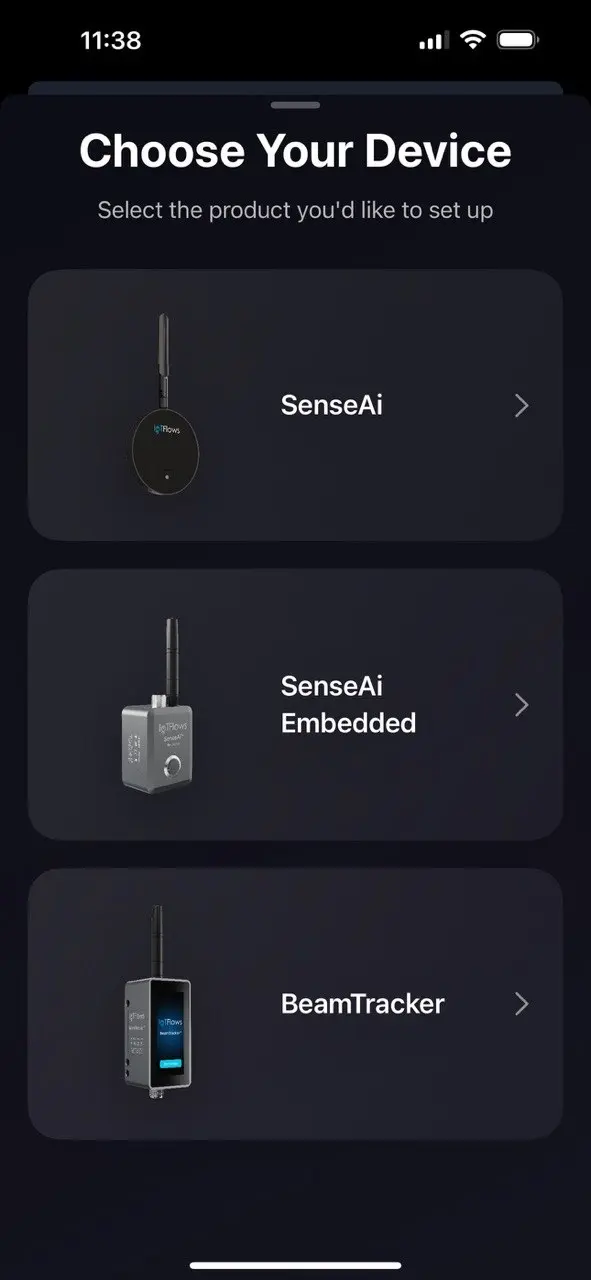
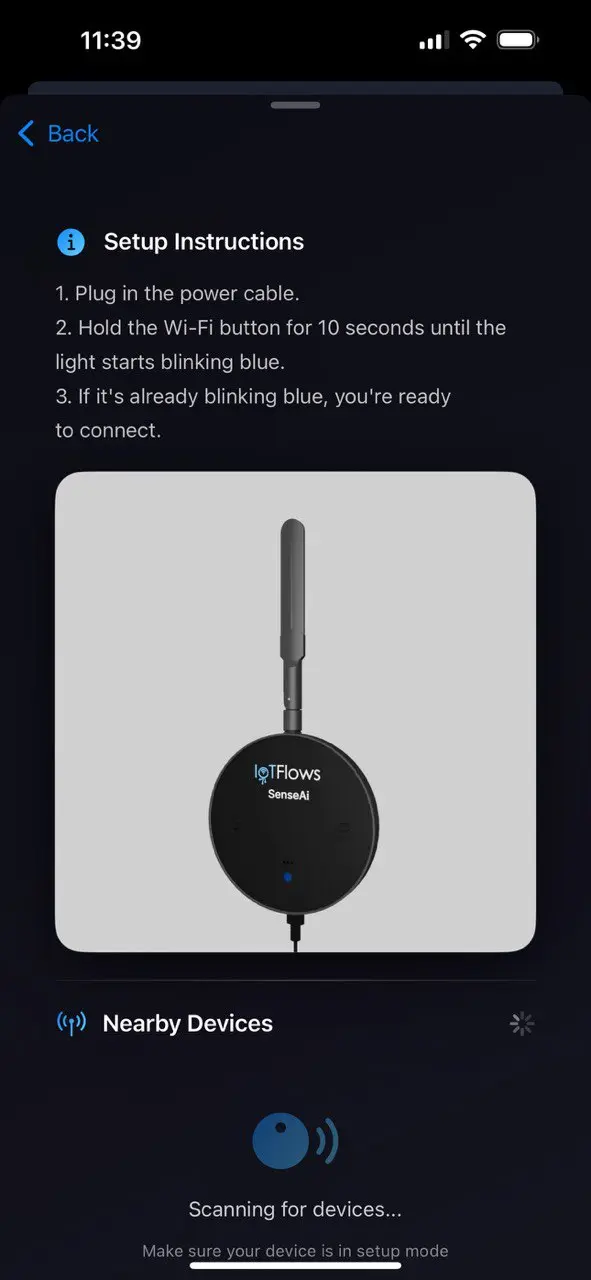
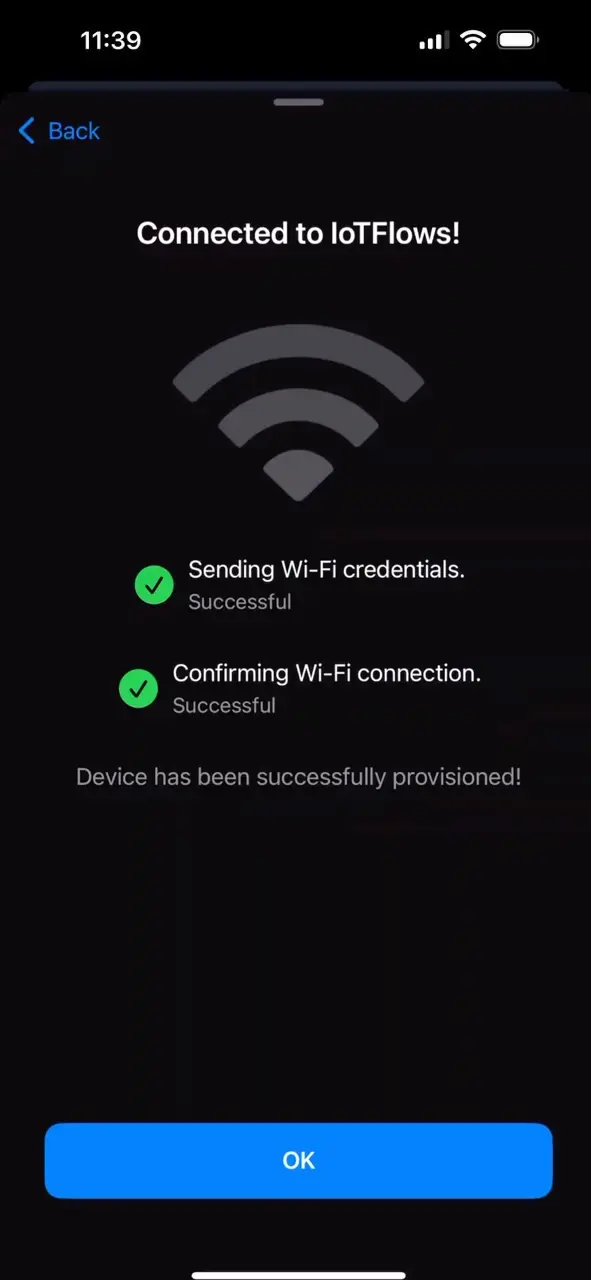 The app's Wi-Fi flow, in order: pick the device type, follow the setup-mode instructions while it scans over Bluetooth, choose the network, and confirm. If your device is not listed in the scan, it is not in setup mode.
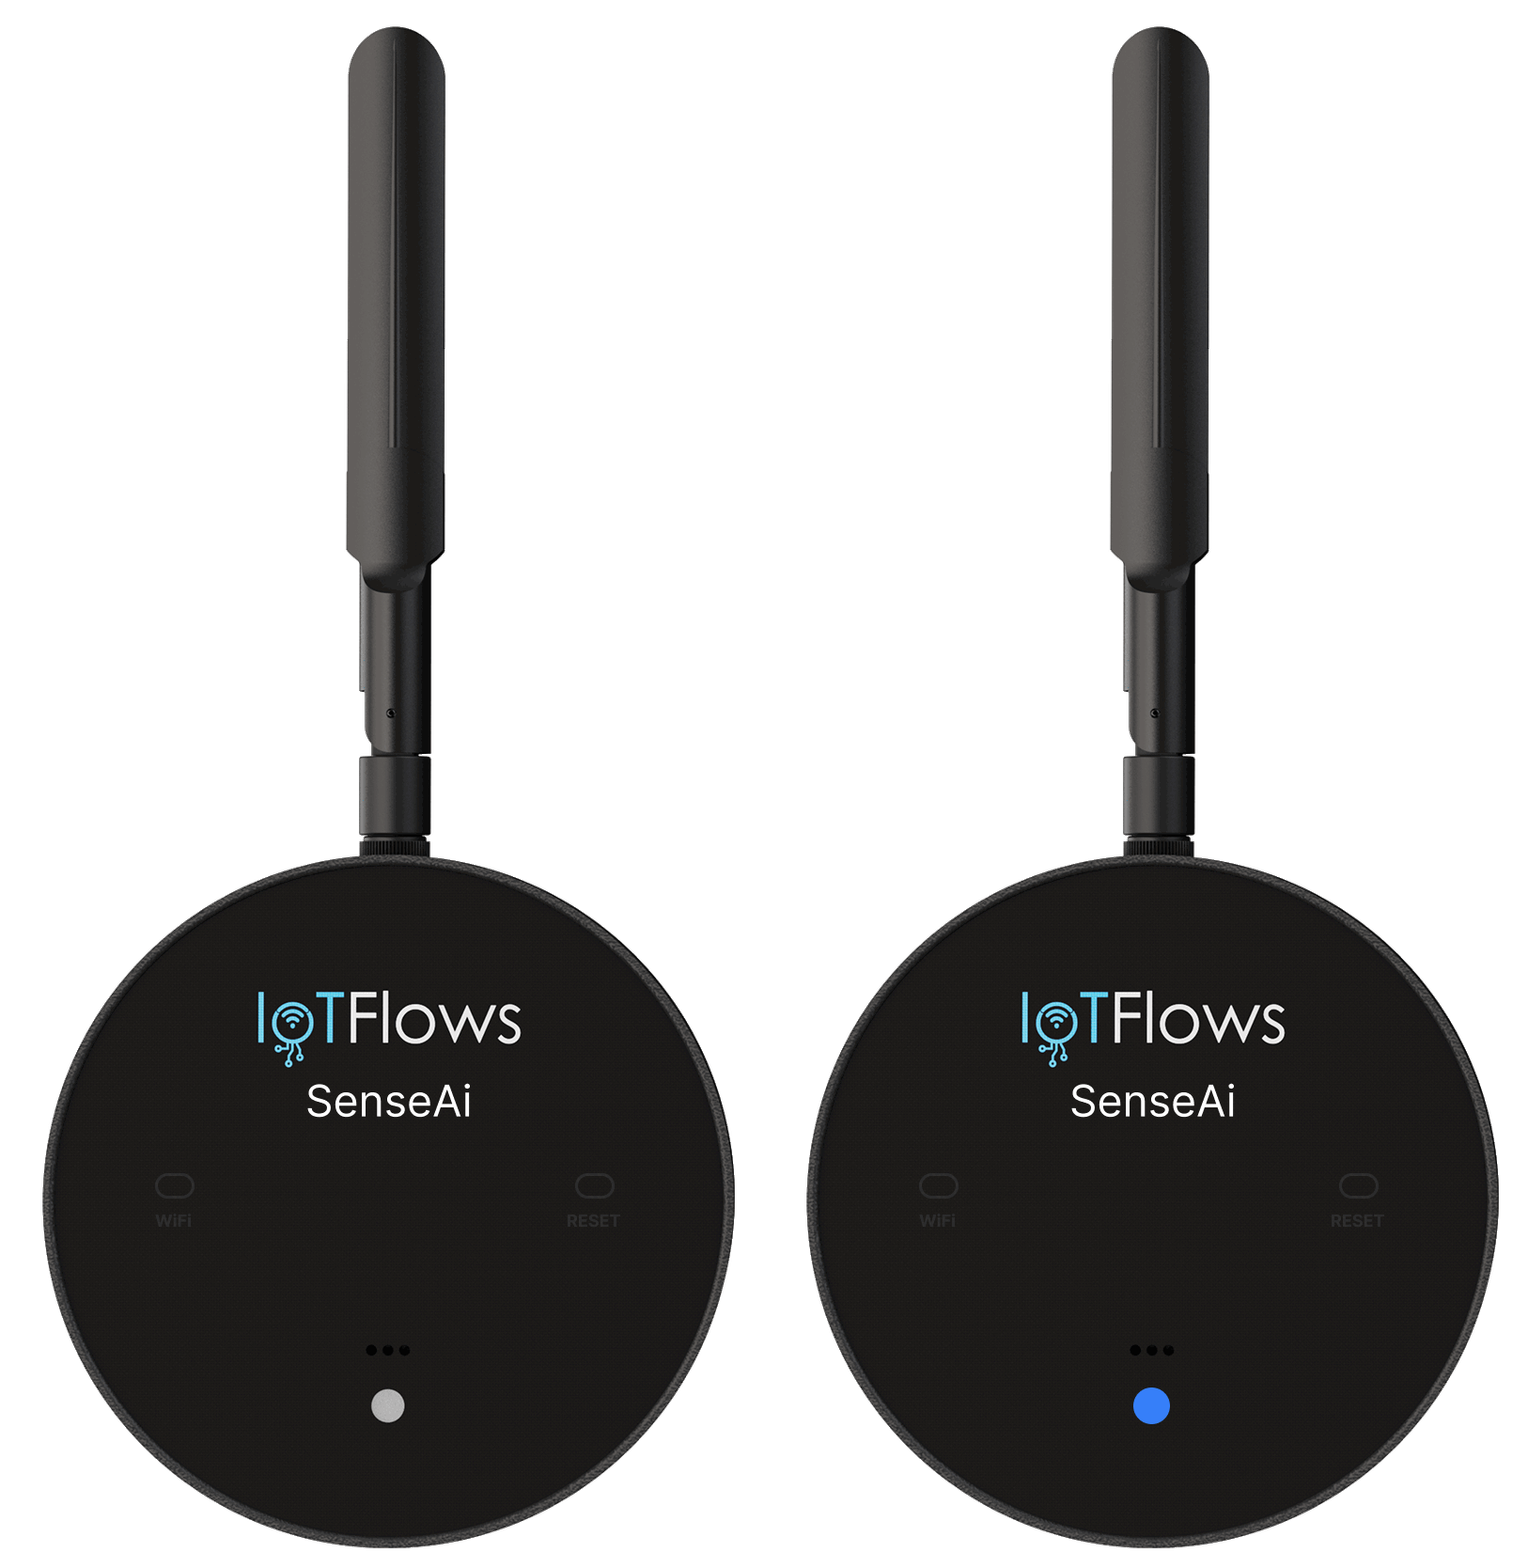 SenseAi
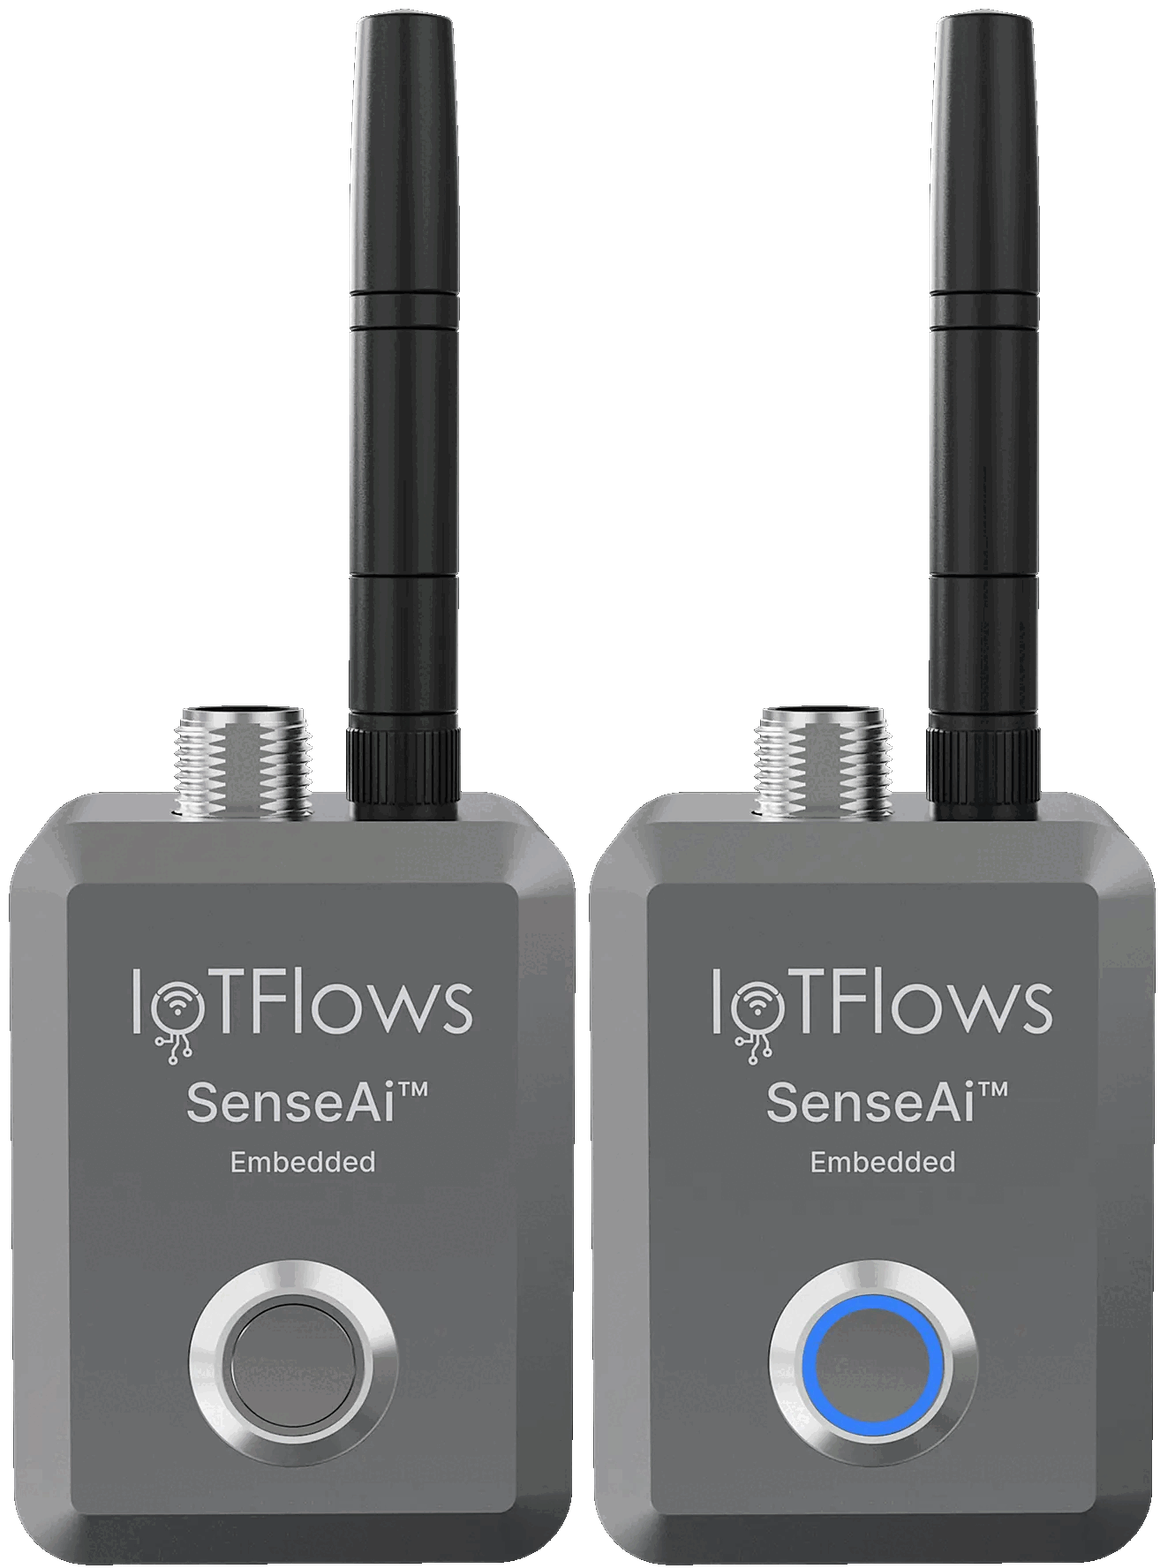 SenseAi Embedded
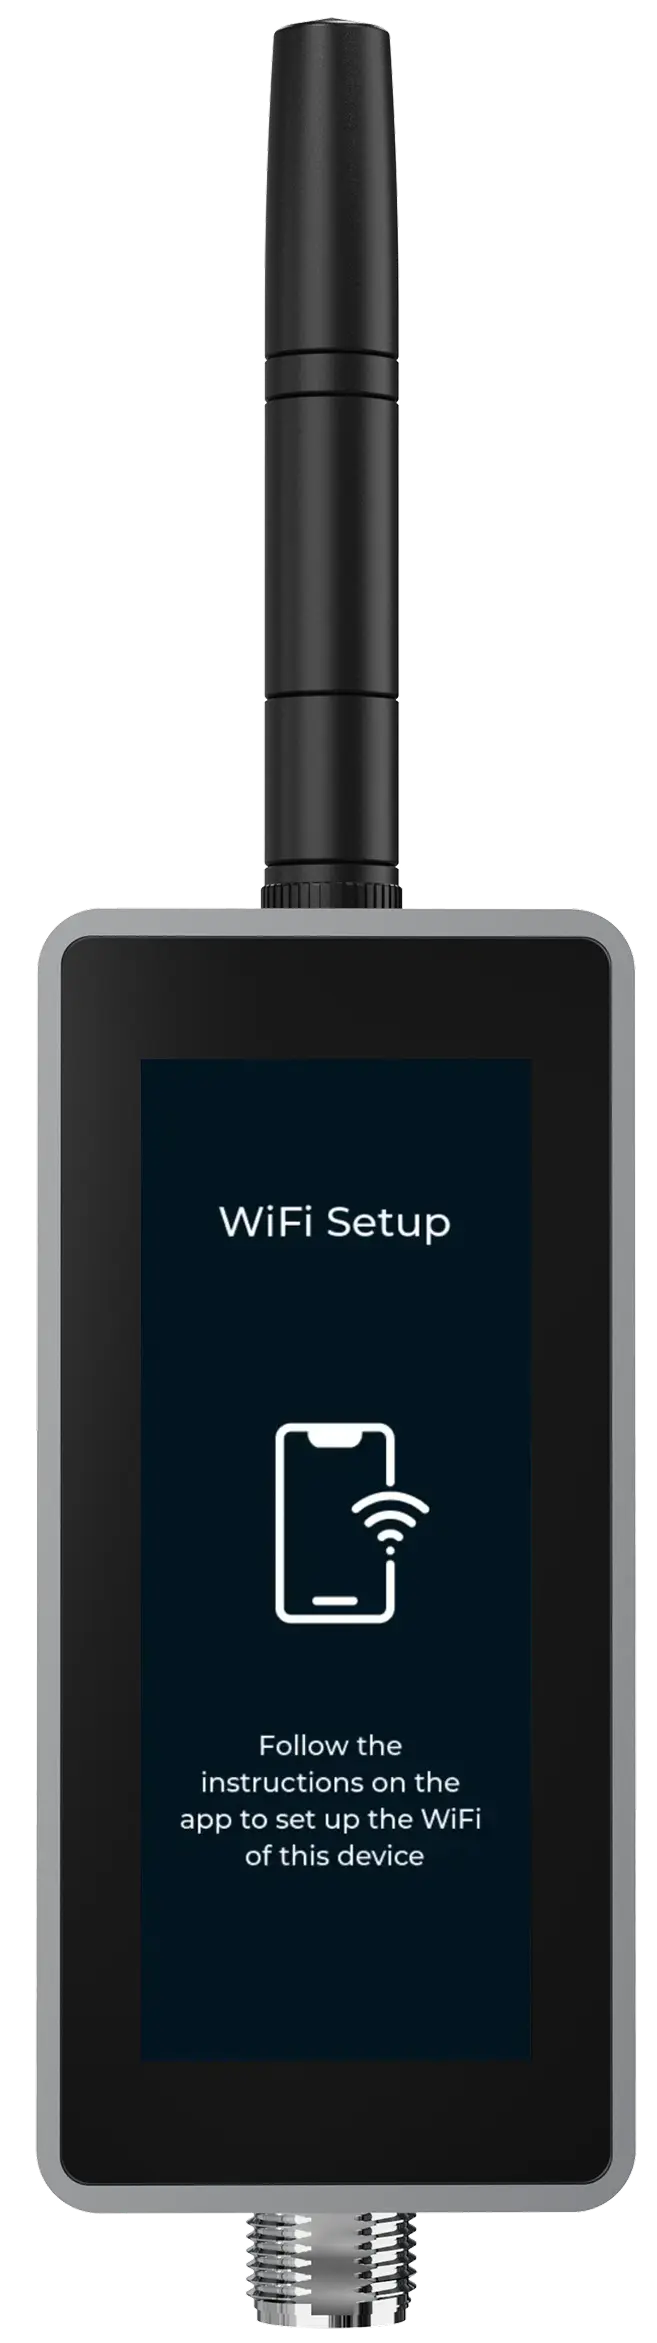 BeamTrackerSetup mode, on each device. The two sensors blink blue; BeamTracker holds a WiFi Setup screen on its touchscreen. None of them is listening for the app until it looks like this.
Reload the Devices page. The device reads online within a minute or two of joining the network.
Still offline after a few minutes? The three usual causes are a 5 GHz-only network, a mistyped password, and weak signal at the machine. Work through Troubleshoot an offline device before changing anything else.
The full procedure, per device, is in Connect a device to Wi-Fi.
Add the machine
The device is online and reporting to nothing. Give it a machine to report about. This section is the same for every device.
- Go to Assets at
/<your-org-id>/assetsand select Add asset. - The modal opens on Select Sensor. Select Skip, I'll do this later.
- In Find or add a machine..., type part of the model or manufacturer, for example
VF-2, and pick the closest entry. - In Machine Identifier, type the number your plant already paints on the machine, for example
trx-as800. - In Machine Name, type the name operators say out loud, for example
Haas VF-2 #3. - Select Select Department and pick a department, or type a new name and press Enter to create one.
- Select Add Asset and wait for "Asset has been added".
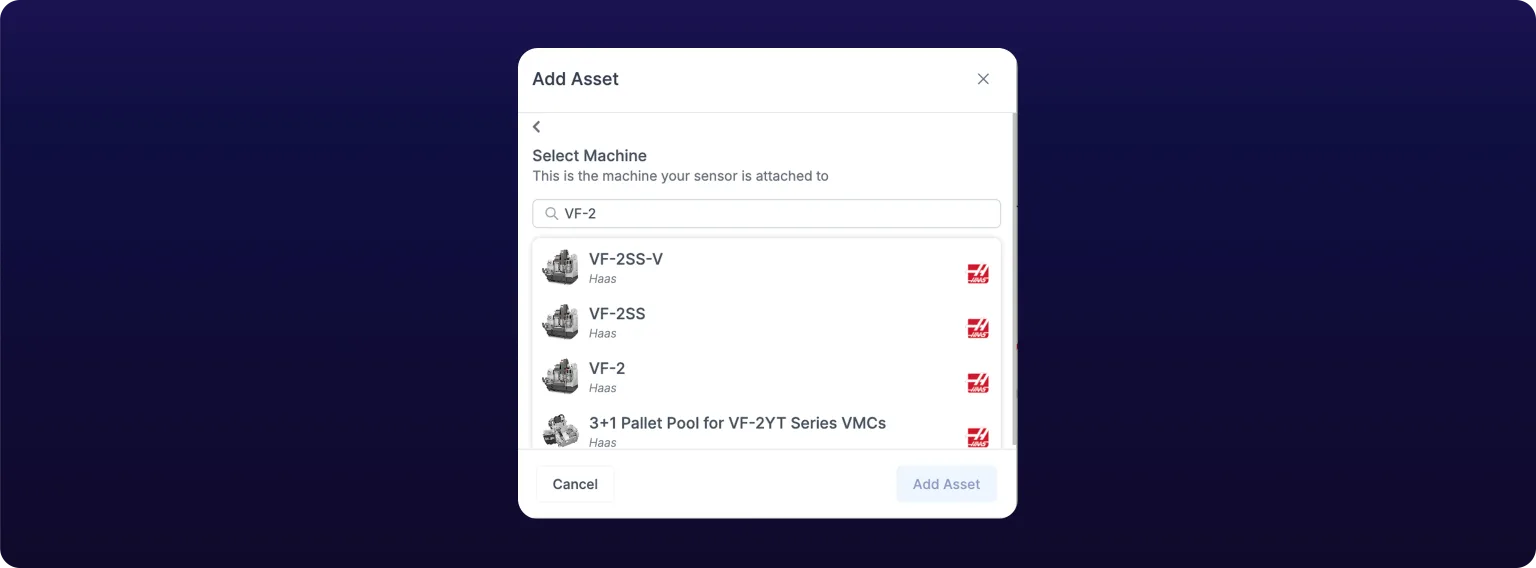 Adding a machine. The catalog search is a convenience; a machine that is not listed can be typed in.
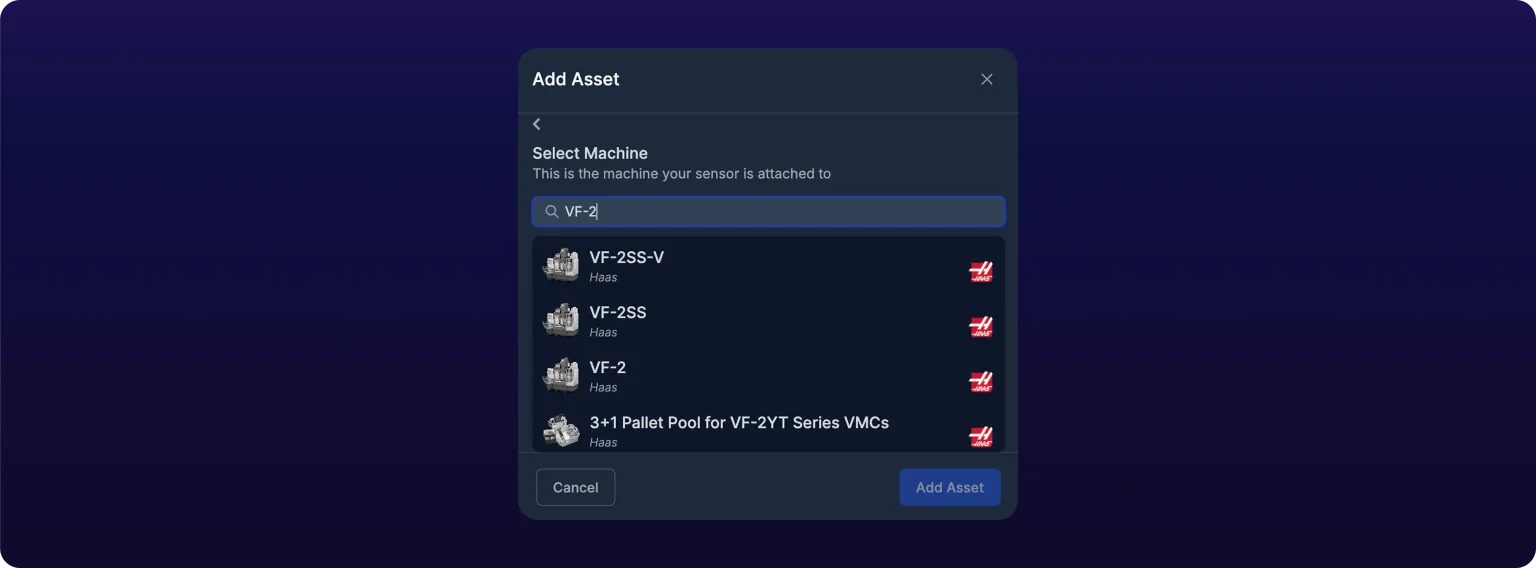
Both text fields are optional, and leaving Machine Name blank costs you: the card falls back to the catalog model name, so a shop with four Haas VF-2s gets four cards reading Haas VF-2.
Department is required and the catalog model is the one field you cannot change later. Everything else is editable afterwards. Field by field, see Add a machine.
Pair the device to the machine
Nothing on the machine's card fills in until a device is tied to the asset, and this is the one step you do not perform yourself. There is no web path for it, and the Select Sensor step you skipped is not the way in.
Contact IoTFlows to tie your devices to an asset. See Get support.
Pairing usually happens during onboarding, so for most readers it is already done by the time the asset exists. Wait for confirmation before continuing: everything below assumes this device reports to this machine.
Confirm data is arriving
- Run the machine normally for ten minutes.
- Go to Assets and find the card you just created.
The card's status ring turns green while the device reads the machine as running, and gray when it does not. A card that changes color as the machine starts and stops is the whole point of this page.
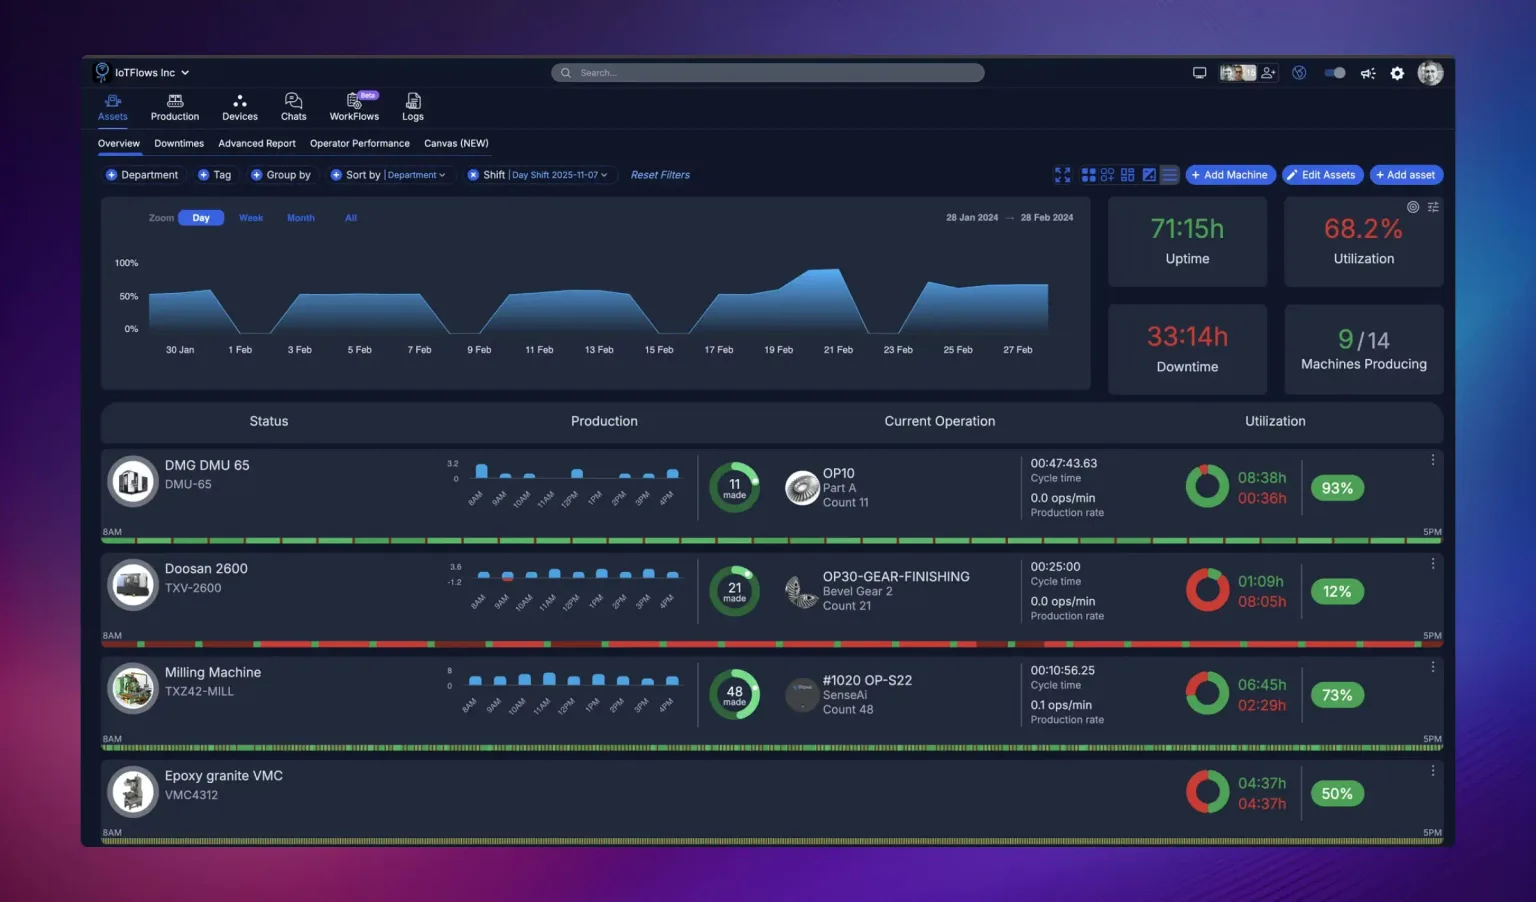 The Assets page. Each machine carries a status timeline for the shift, the parts it made, its current operation, and its utilization.
Open the card to see the first hour as a timeline: green where the machine ran, gray where it did not, with a utilization figure over the same window. One hour is enough to prove the path works and not enough to judge the machine.
If the card is still blank ten minutes after the machine started, the device is reporting to a different asset. Check with support which asset it is tied to rather than creating a second one.
For everything else on this screen, see The Assets page.
Set what counts as running
A new device reports raw signal until you tell it what running looks like on this machine. Sensitivity is that setting, and it takes a different form on each kind of device.
Set a Running Threshold: a line above the machine's idle vibration and below its running vibration.
- Open the machine's asset page and select the sensor image at the top right to open the sensor modal, then open the Calibration tab.
- Start the live capture, run the machine through two or three normal cycles, then stop it for a moment so the trace shows both states.
- Drag Running Threshold to sit between the two levels. IoTFlows saves each change and confirms with "Vibration Upper Threshold Updated".
- Stop the capture.
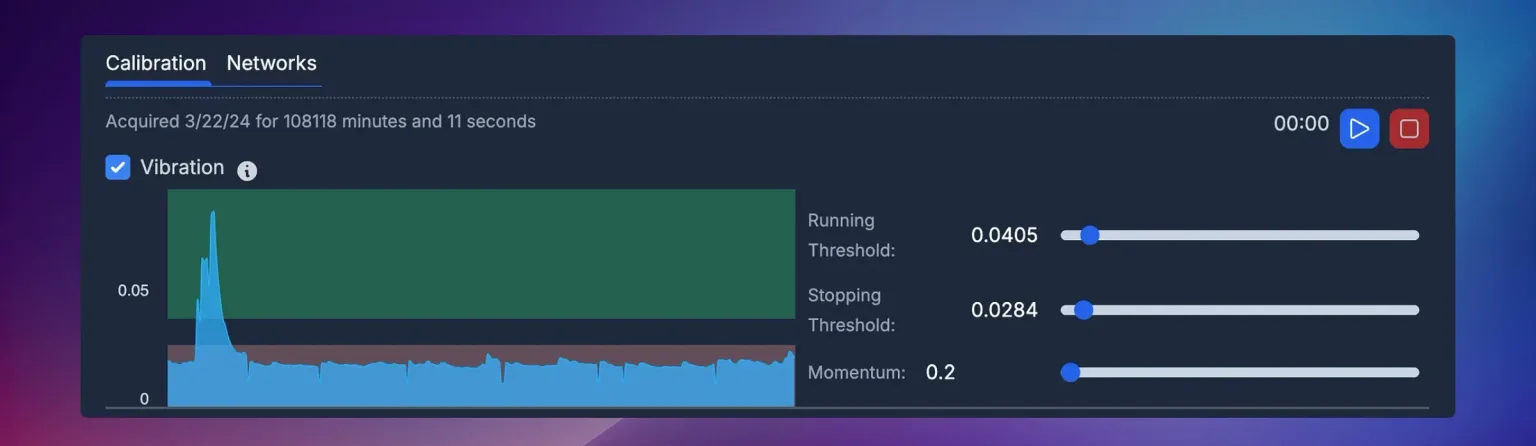 The Calibration tab, with a live vibration trace. Running Threshold is the level the signal must pass for the machine to read as running.
A machine that reads as running while it idles has a threshold set too low. Raise it until the idle stretch of the trace falls below the line. SenseAi also reads acoustics; SenseAi Embedded is sealed and calibrates on vibration alone. See Calibrate SenseAi.
You do not need the rest of the Calibration tab today. One setting per device decides whether the machine reads as running, and it is the only one worth tuning before you have a few days of data to check it against.
What to do next
Leave the machine running for two or three days before you read anything into the numbers. Utilization over one shift tells you about that shift.
When you want part counts rather than run time, the next decision is which algorithm the operation uses. BeamTracker uses Counter, because the beam already counts parts. The vibration devices infer parts from the signal and choose among the other algorithms. See Choose an algorithm.
Then repeat this page for a second machine. The account work is done, so the second one takes the twenty minutes of mounting, provisioning, and calibrating rather than the full hour.
See also
What IoTFlows is and where to start in its docs: the quickstart, how a reading travels from a sensor through Wi-Fi or the 4G/LTE router to the IoTFlows cloud and the dashboard, what the platform reports from that one signal (uptime, downtime, part counts, machine health, and the OEE factors on their own), which device fits which machine (SenseAi, SenseAi Embedded, BeamTracker, the IFCR-150 router, the edge device for Enterprise custom integrations), the eight sections of the docs, which page answers which question, and what you need before the first machine shows data.
The four layers a reading passes through, from the sensor on the machine through Wi-Fi or the 4G/LTE router to the IoTFlows cloud and the dashboard: what each layer decides, why running and stopped is decided on the device while uptime and health are computed in the cloud, and what each layer looks like when it fails.