

Update your profile and handles
Your avatar, name, and the handle each organization knows you by.
Almost everything on this screen belongs to your account rather than to one organization, so a new photo or a corrected last name reaches every organization you belong to at once. Handles are the exception. A handle is the address other people use to find you, written you:organization, and you carry a separate one in each of them.
Before you start. Sign in. No role is required: every member edits their own profile, whatever they can do elsewhere.
Open your profile
- Select your avatar at the top right of any page.
- Select Profile. You land on
/settings/user. - Select Edit at the top right of the Profile heading.
Until you select Edit, the fields are read-only and the avatar ignores a click.
Save writes the username and both name fields in one request and reports User information updated. If it reports Error updating user information, nothing was saved and your typing is still in the fields, so select Save again.
Cancel leaves edit mode. It does not undo an avatar or a handle change, because each of those is written on its own the moment you finish it.
No Profile item in the menu? You are on a machine running in operator view, which hides it along with the rest of the settings. Exit operator view, or open /settings/user on another device.
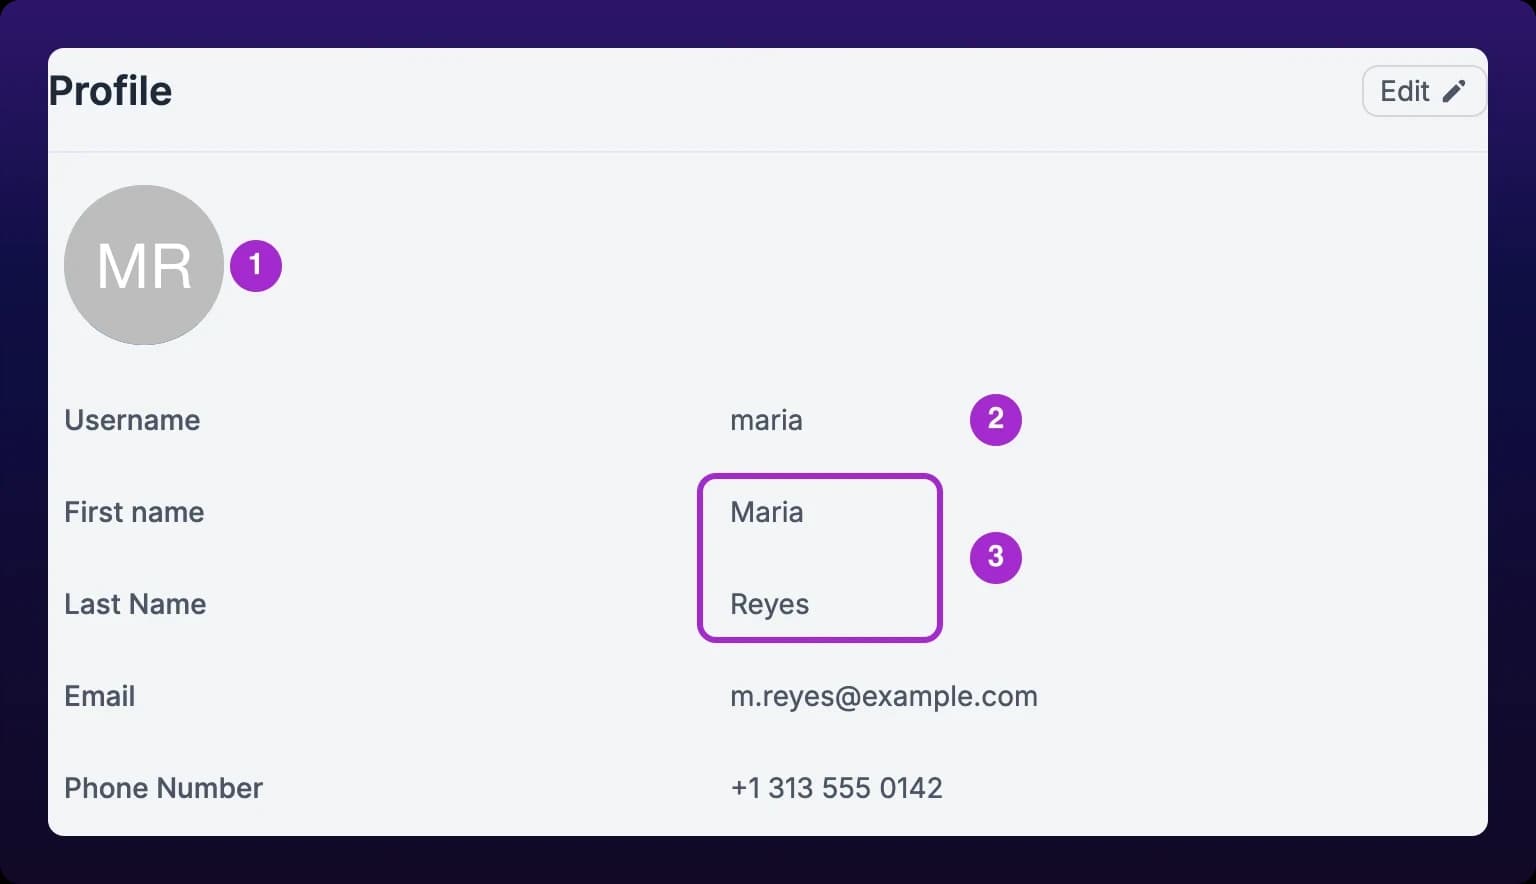 The Profile section of the settings page, with the avatar, Username and name fields. Nothing here accepts a change until you select Edit at the top right.
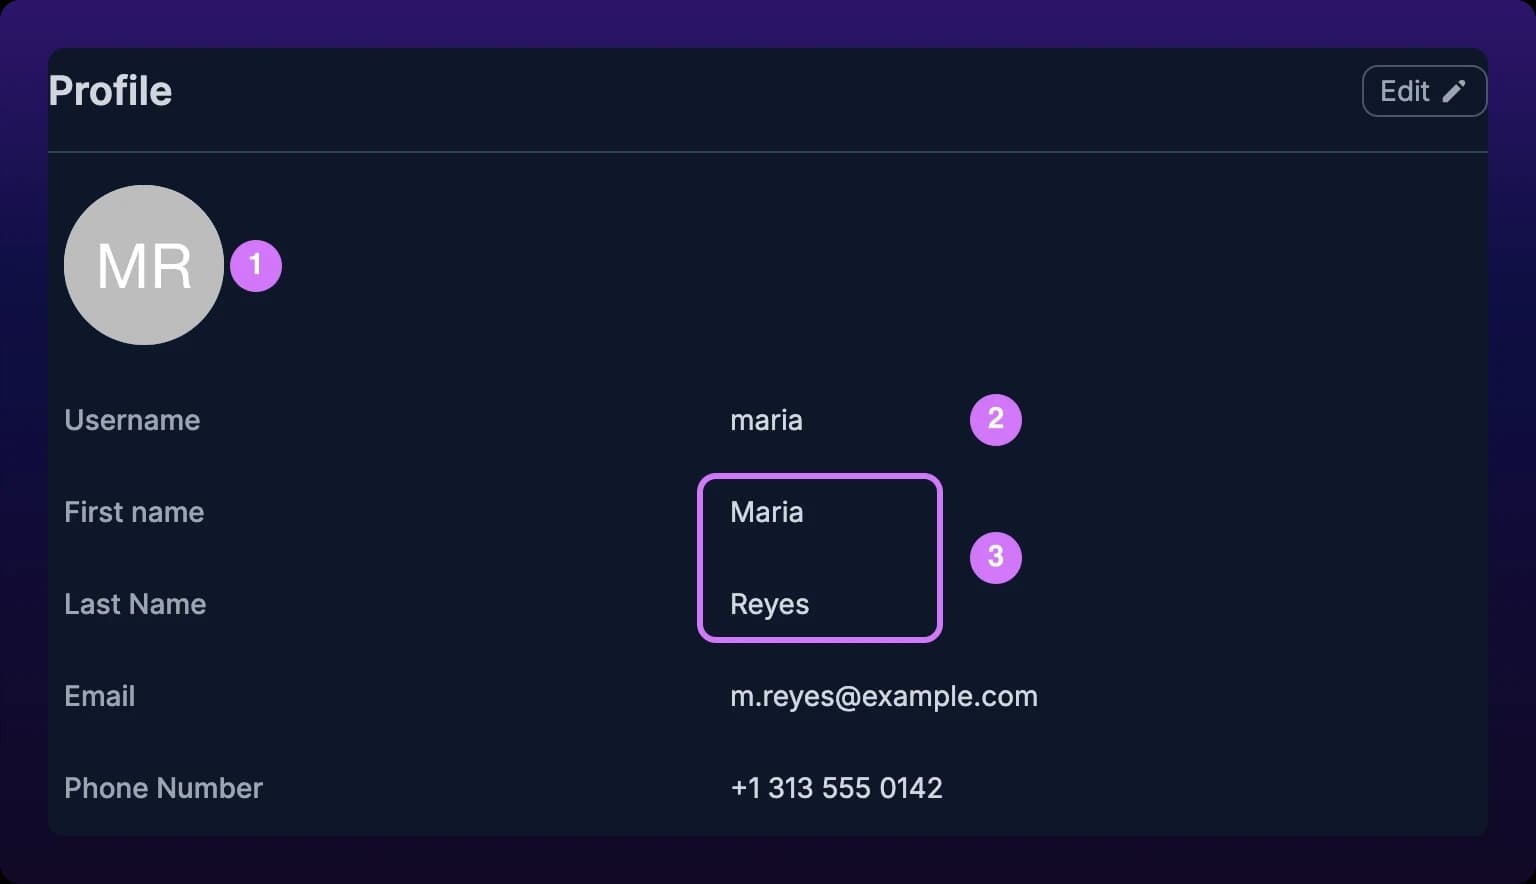
Profile fields
| Field | Scope | Visible to | Changeable |
|---|---|---|---|
| Profile picture | Account | Everyone who shares an organization with you, plus anyone you chat with | Yes, through the crop dialog |
Username | Account | Members of your organizations, in the directory and every people picker | Yes, with Edit and Save |
First name | Account | The same | Yes, with Edit and Save |
Last Name | Account | The same | Yes, with Edit and Save |
Email | Account | Members of your organizations, in the member directory | No. Contact support |
Phone Number | Account | Nobody. Alert rules read it to send SMS | Yes, but through its own dialog. See Change your phone number |
| Organization handle | One per organization | Anyone on IoTFlows who knows it | Yes, one row at a time |
Upload and crop an avatar
- Select Edit, then select your current picture.
- Pick an image file. A HEIC photo from an iPhone is converted for you. If the conversion fails, the page reports Failed to convert HEIC image and no dialog opens.
- In Edit Profile Picture, drag the photo under the square crop box, then set Zoom and Rotation with the two sliders.
- Select Preview. It reads Processing... while it renders the crop.
- Check the result. Back returns to the crop box with your settings intact. Cancel discards the whole thing.
- Select Submit. It reads Uploading..., then IoTFlows reports Profile picture updated and closes the dialog.
The crop box is square and your avatar is displayed as a circle, so leave room around a face rather than cropping tight to it. There is no file size to worry about: the picture is compressed to roughly 500 KB before it is sent, whatever you started with.
Still looking at the preview after Submit?
The upload failed, and this dialog reports nothing when it does: the spinner stops, the preview stays, no message appears. Select Cancel and run the six steps again. If a second attempt sits there too, the server is refusing the file and a third will not help.
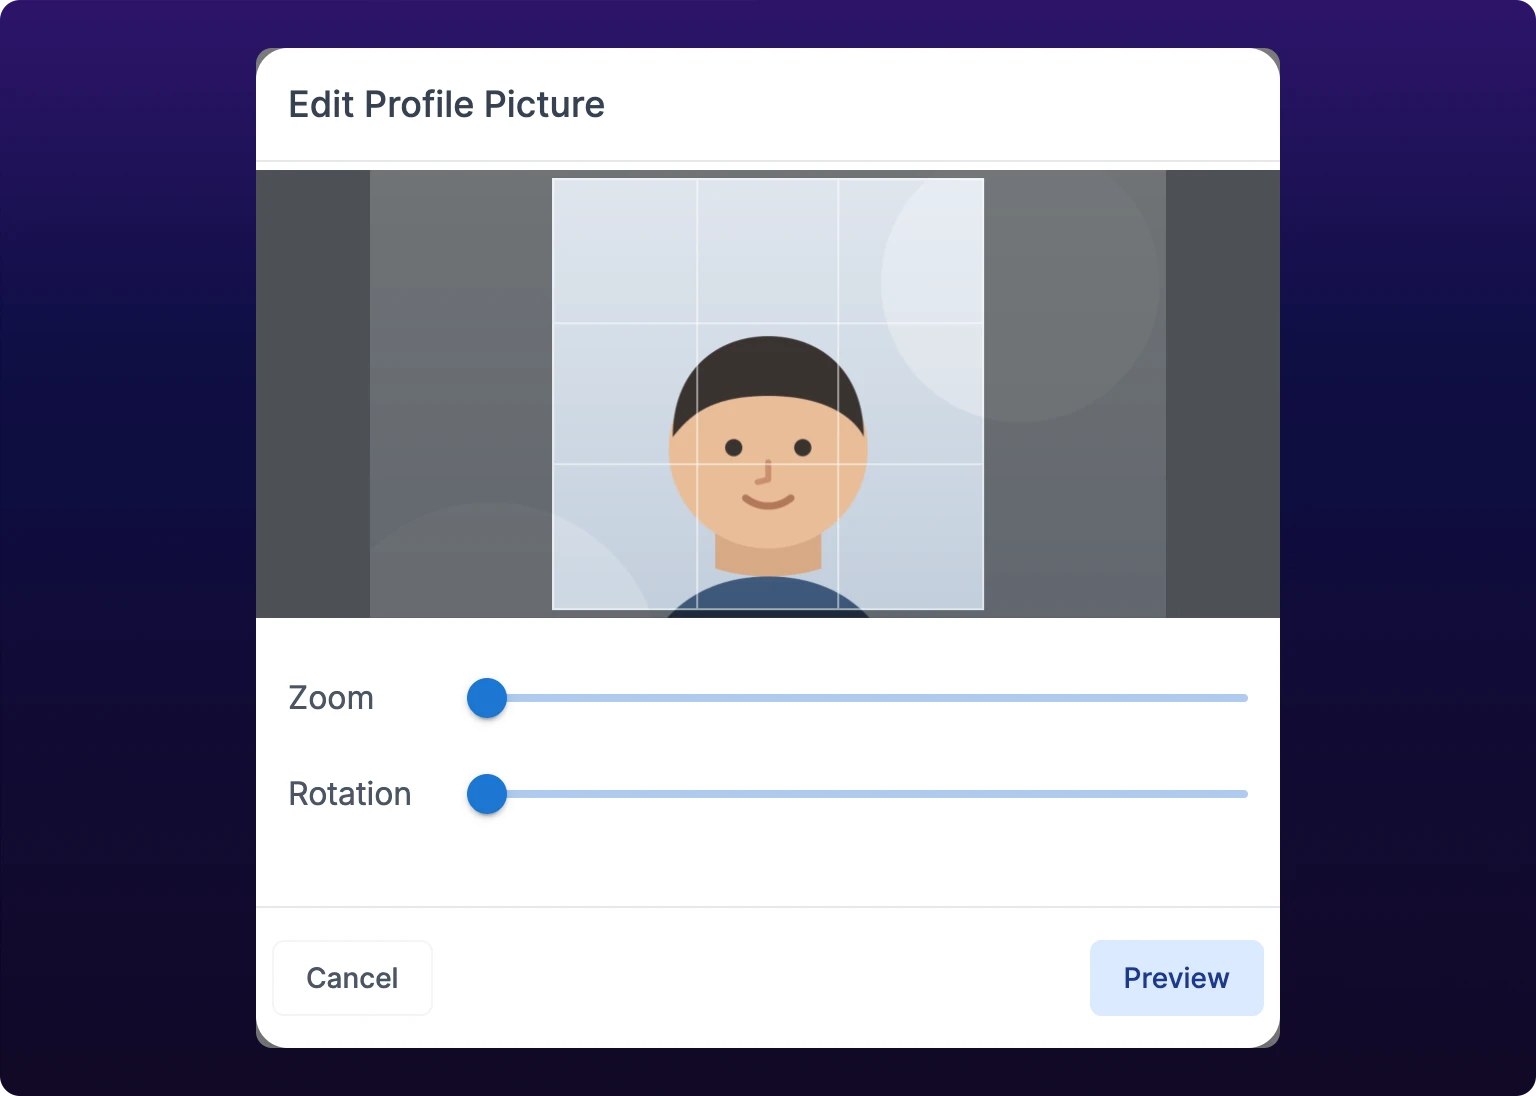 The Edit Profile Picture dialog, with the square crop box over the uploaded photo and the Zoom and Rotation sliders under it.
Username and name
Your username is the name you chose when you created the account. It is unique across IoTFlows, it is shown in italics beside your full name in the member directory, and it is one of the two things you can sign in with: the sign-in card accepts Email or Username.
Set First name and Last Name even if the username is all anyone sees at a glance. A work-order assignee, a scheduler row and a chat member all label you with your full name.
Your username also seeds your organization handles: sign up as mreyes and your handle in Acme starts out as mreyes:acme. You are free to edit that first half organization by organization, so a handle need not match your username, but every handle is checked for uniqueness within its organization because chat and messaging address you by it.
Email is read-only here because it identifies your account to the sign-in service. Changing it is a support task.
Per-organization handles
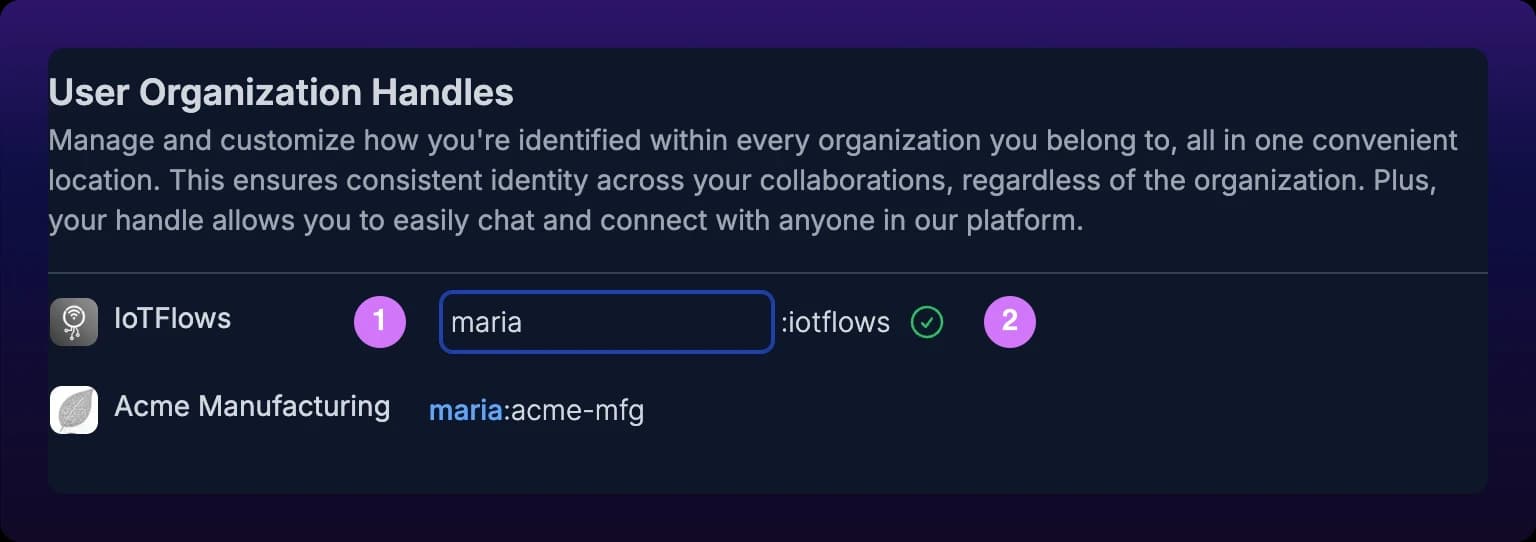
A handle reads maria:acme-mfg. The half before the colon starts as the username you chose at sign-up and is yours to change. The half after it is the organization's own handle, which an administrator sets on the organization profile.
- Scroll to User Organization Handles. Each organization you belong to has a row, with its logo and its name.
- Select a row to edit it. Only the first half becomes a field; the colon and the organization stay fixed beside it.
- Type the handle you want. The field lowercases as you type and drops punctuation.
- Wait half a second. IoTFlows checks that handle against that one organization and reports User handle available with a green check, or User handle not available with a red icon.
- Press Enter, or select anywhere outside the field, to save.
Each row is checked and saved on its own, so changing your handle in one organization leaves the others alone. Clearing the field and selecting away restores the handle the row had, without sending anything.
Nothing stops you saving while the icon is red. If that handle is already taken in that organization, the save is refused: the row snaps back to its previous handle and shows the message the server returns. Read the icon before you press Enter.
Hover over a saved row and a copy button appears at the end of it. It copies the whole you:organization and reports User handle copied!.
Which handle should you pick?
Use the same handle in every organization if you work across several. Colleagues search by handle to add you to a chat from another organization, to assign you a work order, and to place you on a scheduler row. A different handle per organization means being found in only one of them, by whoever guessed right.
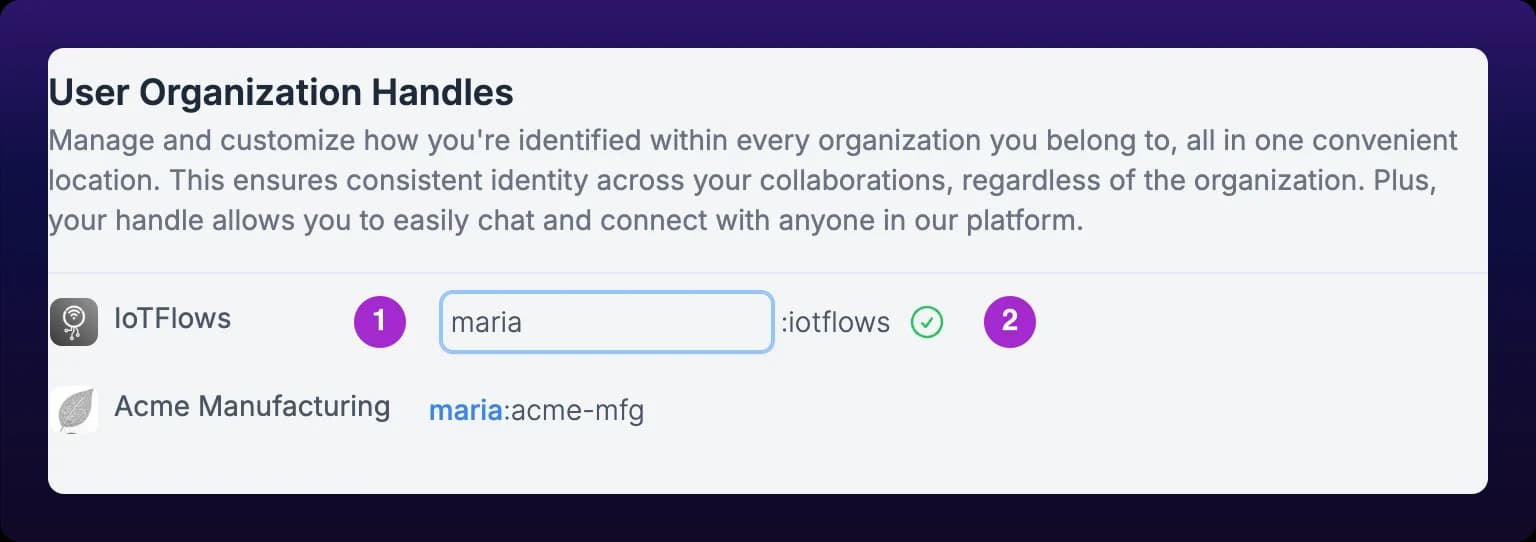 The User Organization Handles list. Every organization you belong to carries its own handle, written you:organization, with its own availability check.
On mobile
The iOS and Android apps open this same page in a web view, so every step above is the step on a phone. Selecting the avatar opens the phone's own photo library and camera, and the crop box and both sliders take touch.
Two things differ. The Two-step authentication section further down reports whether your account has it, but the switch does nothing in the app: enroll from a desktop browser. And User Organization Handles lists every organization you belong to whichever one the app is currently in, so you never switch organizations to fix a handle.
See also
- Change your phone number, the one profile field with its own dialog
- Turn on two-step authentication, the other setting on this page
- Switch organizations, and what your account carries across the switch
- Start a chat, where someone else's handle is what you type
- Set up your organization profile, where the half of your handle after the colon comes from
How to end your own membership in an IoTFlows organization, and what it costs you. The Leave organization row sits near the bottom of Organization Settings at /settings/organization and is there for every member whatever their role. Leave, then Confirm Leave, and IoTFlows reports "You left <organization> organization" and returns you to the dashboard home. An Organization Owner has to hand ownership to another member first, because an organization cannot be left without an Owner. Leaving costs you every asset, board, team, and chat scoped to that organization; your IoTFlows account and any other organization you belong to are untouched. There is no way back on your own: rejoining takes a fresh invite, and the new membership starts with access to all machines and no team or board memberships.
How to add or change the phone number on your IoTFlows account, and why an account without one cannot receive SMS alerts. The number lives on your account rather than on an organization, so one number follows you into every organization you belong to. Select Edit in the Profile section at /settings/user, then Edit Phone Number, pick the country from the flag dropdown, type the rest of the number and Submit. IoTFlows texts a code; type it into Verification code and select Verify. Your profile is only written when the code is accepted, so abandoning the dialog at the code step leaves the old number in place. There is no resend button: select Back and submit the number again. The SMS subscriber list on an alert rule reads this field, so a member without a number is listed as No phone number and cannot be added.